|
My BMW Bobber,
part 53
CAD version here

I took the completed wooden mold to Helmond, where two very
talented metalshapers live. Ben (from Bens
Metalshaping Shop) and Emile (from Barts Metalshaping) had
offered to show us some metalshaping tricks. These two are real
craftsmen and I am very gratefull that I was given this opportunity!
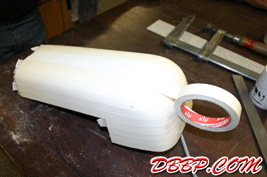
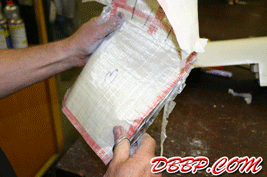
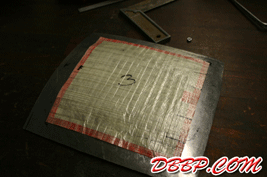
The first step was to cover the wooden mold with a layer of
ordinary masking tape.We decided it would be best to make the
cover out of 3 pieces, and the edges of the 3 pieces were marked
with red tape. |

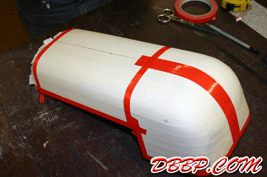
The next step was to cover the whole thing with glassfiber
reinforced tape; this tape does not stretch so it will hold
the shape of the pattern perfectly. On top of this layer we
made some markings with a permanent marker so that the pattern
pieces could be aligned perfectly at a later stage. Finally
a second layer of reinforced tape was applied crosswise to the
first layer. Now we had an exact pattern of the shape we wanted
to make, we carefully peeled it off the wooden mold and covered
the sticky side with talcum powder so it was not sticky anymore. |


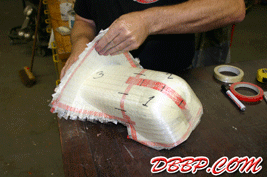
The 3 pieces of the pattern were carefully cut out, and we
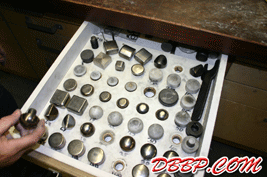
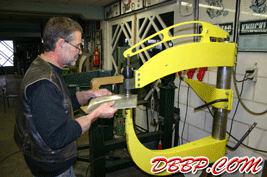
started with the top part. Using a radius template we determined
the "crown" of the part, and used a matching tool
in Emile's homemade Yoder. The Yoder uses a metal tool to hit
the aluminum part, while the part rests on a rubber block. Sort
of a mechanical version of the hammer and bag, working at a
few hundred rpm to stretch the metal. |
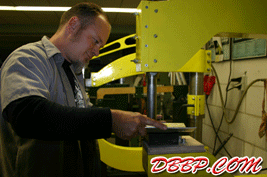
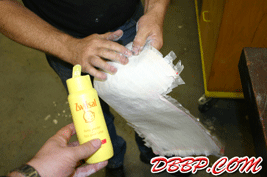
The lumpy surface that the Yoder makes is smoothed by a
planishing hammer (also homemade). The planishing hammer flattens
the metal between two steel tools at much higher rpm and leaves
a smooth shiny surface. During the whole process the tape pattern
is used to see where and how the metal needs to be shaped, when
the pattern lies on the metal and touches it everywhere the
part is finished. The cover is already finished but the story
is getting too long for one episode, so it will be continued
next week. |
|


